If loose poop bags keep tangling in your pocket, falling out of your coat, or running out halfway round the block, you can make a DIY dog poop bag holder that clips to your leash and stays put. A small fabric pouch with a slit in the front holds a neat stack of bags, and one bag pulls out at a time while the rest stay dry and in place.
You need one piece of waterproof fabric, a needle and thread or fabric glue, and a small carabiner, and the whole project takes less than an hour. This guide gives you exact sizes, a slit that dispenses without tearing, and a loop that fits any standard leash handle.
By the end you will have a washable holder you can refill in under a minute, plus a quick test that proves it works before your next walk. Keep a spare roll at home for refills, and your holder will be ready every time you reach for the leash.
Time and Difficulty
Total Time: 45 minutes | Active Time: 35 minutes | Difficulty: Beginner
What You Need
Materials: waterproof fabric (an old rain jacket, shower curtain, or oilcloth) at least 15 x 6 inches, 1 strip of fabric 4 x 1 inch for the loop, 1 small carabiner about 1.5 inches long, 8 to 10 standard dog poop bags.
Tools: fabric scissors, ruler, chalk or a soft pencil, straight pins, a hand needle and strong thread or fabric glue, an iron (optional).
Waterproof fabric matters here. Cotton soaks up rain and damp grass, and a wet stack of bags tears when you pull it. If your fabric frays a lot at the cut edge, pick a coated fabric or seal the edges with fabric glue before you sew.
At a Glance
- Measure and cut the fabric panels
- Cut the dispensing slit in the front panel
- Pin the panels with right sides together
- Make a DIY Dog Poop Bag Holder pouch by sewing three sides
- Turn the pouch right side out and press the seams
- Fold the bags into a flat stack
- Load the bag stack through the slit
- Attach the loop and carabiner to the pouch
- Clip the holder to your leash and test a pull
Measure and cut the fabric panels
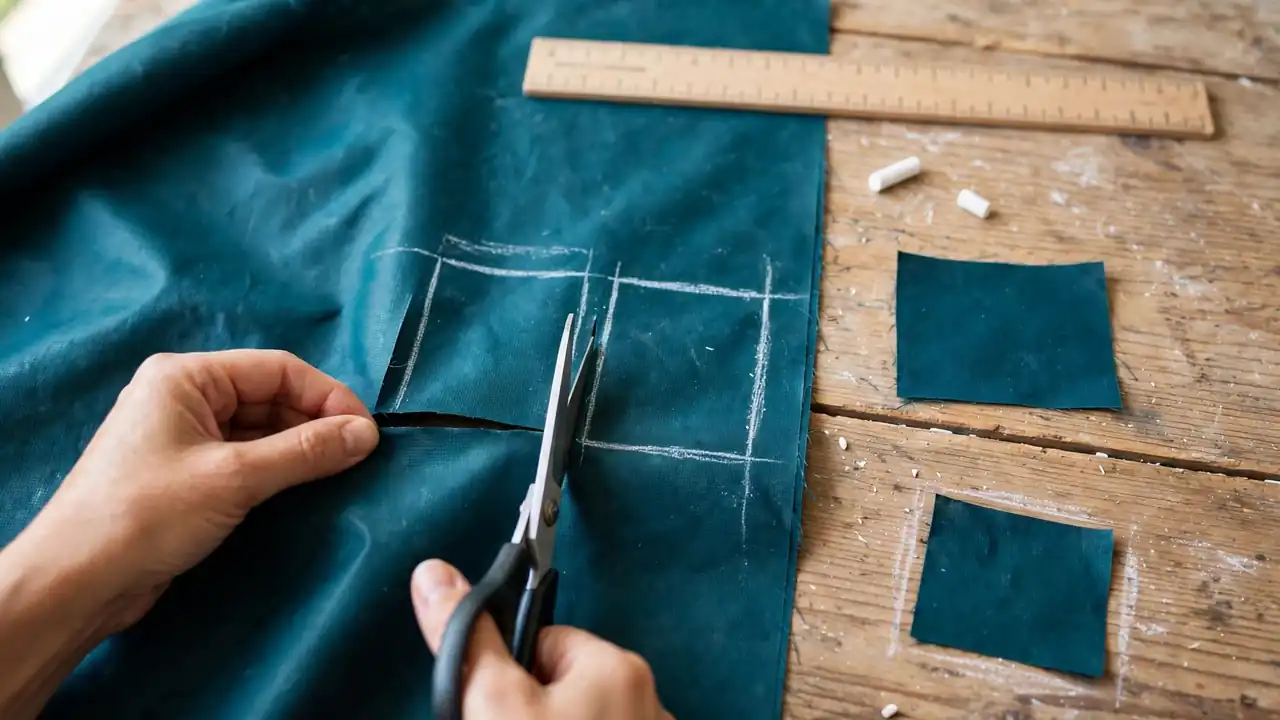
A ruler and chalk beat guesswork on a pouch this small, because a panel that is half an inch short leaves no room for a seam. Mark two rectangles on the back of your fabric, each 7 inches wide and 5 inches tall.
Mark the loop strip too, 4 inches by 1 inch. Cut along the chalk lines with fabric scissors, keeping the blade flat on the table so the edges stay straight.
Cut the dispensing slit in the front panel
Choose one panel as the front, the side that will face out on walks. Measure 2.5 inches down from its top edge and mark the centre point.
Draw a horizontal line 2 inches long through that point. Cut carefully along the line with the tip of your scissors, then dab a thin line of fabric glue along each cut edge and leave it for 10 minutes so the slit cannot fray wider with use.
Heads Up: Keep the cut fabric and scissors away from your dog while you work. A loose scrap looks like a toy, and a swallowed piece of coated fabric can block a small dog’s gut, so bag up scraps as you go.
Pin the panels with right sides together
Right sides are the printed or coated sides you want on the outside later. Lay the back panel face up, lay the front panel face down on top of it, and line up all four edges.
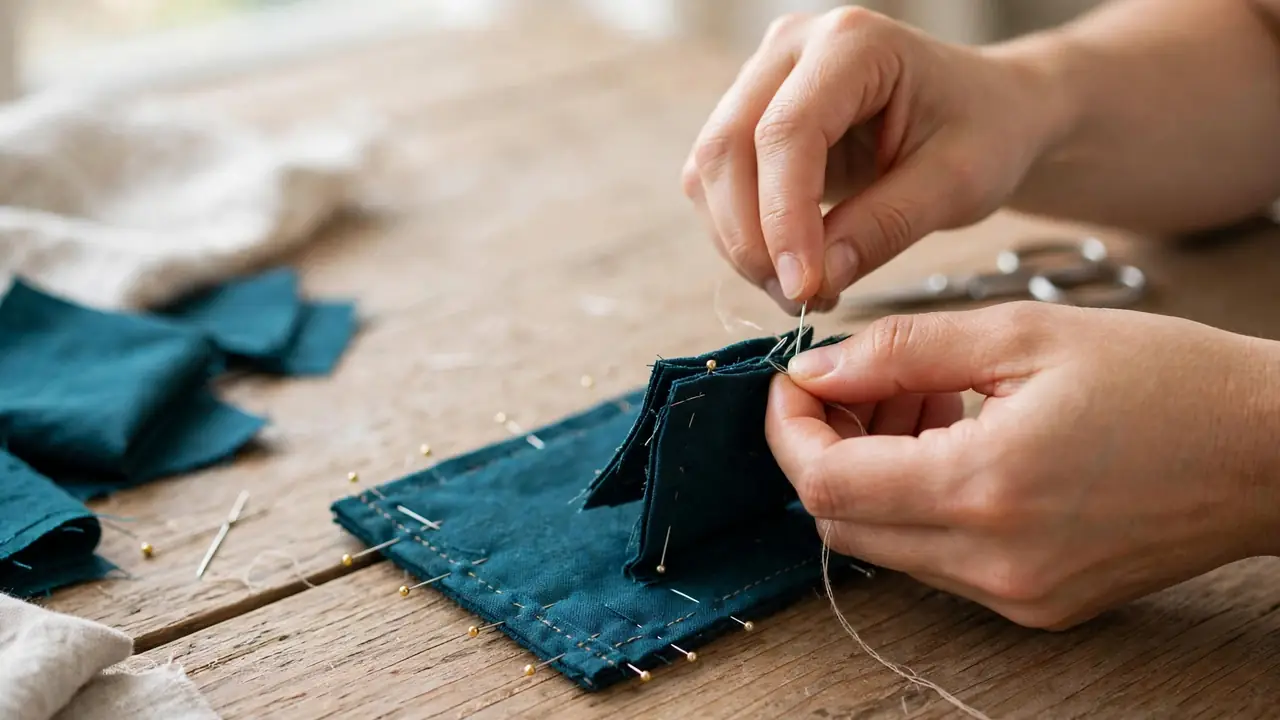
Push a straight pin through both layers every 1.5 inches around the sides and the bottom, leaving the top edge open. Pins stop the slippery waterproof fabric from sliding while you sew, which is the usual cause of a crooked pouch.
Make a DIY Dog Poop Bag Holder pouch by sewing three sides
A 1/4-inch seam allowance gives a snug pouch without eating into the space the bags need. Sew down one side, across the bottom, and up the other side, keeping the top edge open.
Backstitch for 3 stitches at the start and the finish so the seam cannot unravel when you pull a bag. With fabric glue instead of thread, run a 1/4-inch bead along the same three edges, press the layers together, and leave the pouch flat for 30 minutes.
Turn the pouch right side out and press the seams
Push a blunt pencil into each bottom corner from the inside and press it out, so the corners turn into square points rather than rounded lumps. Pull the pouch through the open top, then poke the corners out again from the outside.


Paid Links - As an Amazon Associate, I earn from qualifying purchases.
Press the seams flat with your fingers, or with an iron on a low setting for 10 seconds per side if your fabric allows heat. A flat seam lets the bag stack slide in without catching.
Fold the bags into a flat stack
Loose bags bunch up and jam in the slit, so folding them first is worth the minute it takes. Lay 8 to 10 bags flat, fold each one in half lengthwise, then fold it in half once more.
Stack the folded bags in one neat pile, all with the same edge facing the same way. A stack of 10 bags measures about 1/2 inch thick, which fits this pouch without stretching the slit.
Load the bag stack through the slit
Loading through the open top would leave bags loose, so the slit does the work instead. Hold the pouch with the slit facing you and slide the folded stack in through the open top, then turn the stack so its top edge sits behind the slit.
Poke one corner of the top bag out through the slit with a fingertip. That corner is your pull tab, and the bags below it stay stacked behind the slit until you need them.
Attach the loop and carabiner to the pouch
Fold the 4 x 1 inch strip in half to make a loop, and pin it inside the open top edge at the centre back, with the fold pointing up. Sew across the top edge to close the pouch, catching the loop ends in the same seam, and backstitch over the loop twice for strength.
Thread the small carabiner through the loop and close its gate. Tug the loop hard once: it should hold firm, since it will carry the pouch on every walk.
Pro Tip: If your carabiner gate snags on the fabric, clip it through the loop from the back side so the gate faces away from the pouch. The pouch then hangs flat against the leash instead of twisting round it.
Clip the holder to your leash and test a pull
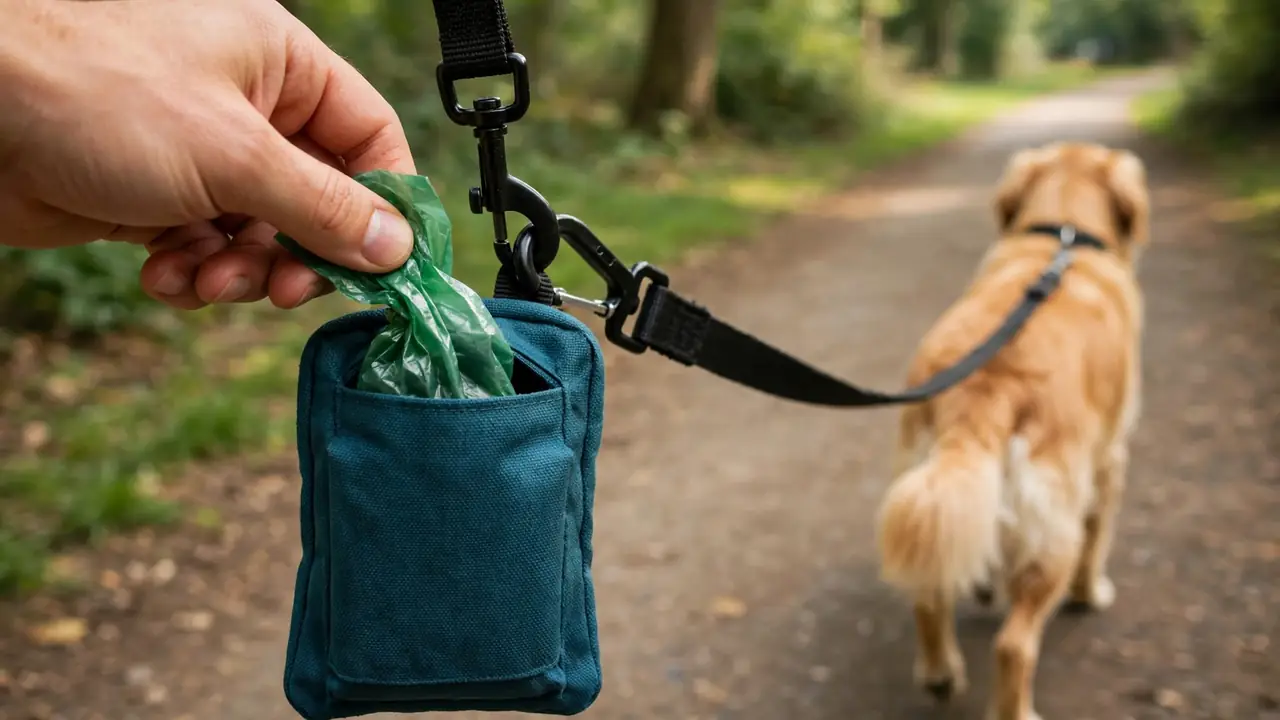
Clip the carabiner to your leash handle or to a D-ring near the handle, and let the pouch hang with the slit facing out. Pull the bag corner out slowly with one hand, the way you would on a walk with a dog on the lead.
One bag should come out clean, and the next bag’s corner should follow into the slit on its own. If two bags come out together, your stack is too loose: refold it tighter or drop the count to 8 bags.
Troubleshooting
| If this happens | Try this |
| The bag tears at the slit | Widen the slit by 1/4 inch at each end and seal the edges again with fabric glue. |
| Two bags pull out at once | Refold the stack tighter, or drop from 10 bags to 8 bags. |
| The stack will not fit in the pouch | Check that the panels were cut to 7 x 5 inches before sewing, and fold each bag once more. |
| The pouch twists on the leash | Clip the carabiner gate facing away from the pouch, or move the loop to the centre of the top edge. |
Frequently Asked Questions
Can I make this holder without sewing?
Yes. Use fabric glue along the same three edges, press the layers together, and leave the pouch flat for 30 minutes before you turn it. Glued seams hold well for light use, though sewn seams last longer through washing.
How many bags does the holder carry? It carries 8 to 10 standard folded bags. Larger bags, or bags on a roll, take up more space, so test your own bags and drop the count if the stack feels tight.
Can I wash the holder?
Yes, if the fabric allows it. Empty the bags, close the carabiner, and hand wash the pouch in cool water with mild soap. Let it air dry fully before you refill it, so damp bags do not tear.
Will the holder fit any leash? It fits any leash with a handle loop or D-ring that a small carabiner can clip to, which covers most standard, rope, and retractable leashes. For a very thick padded handle, use a slightly larger carabiner and check that the gate closes fully.
What if my dog chews the holder? Take it off the leash when you get home and store it out of reach. This holder is a walking tool, not a toy, and coated fabric is not safe for a dog to chew or swallow.
Quick Reference Card
You need: waterproof fabric 15 x 6 inches, loop strip 4 x 1 inch, 1 small carabiner, 8 to 10 bags, scissors, ruler, chalk, pins, needle and thread or fabric glue.
- Cut two 7 x 5 inch panels and a 4 x 1 inch loop strip
- Cut a 2-inch slit in the front panel and seal its edges
- Pin panels right sides together, top edge open
- Sew three sides with a 1/4-inch seam
- Turn right side out and press the seams flat
- Fold 8 to 10 bags into a flat stack
- Load the stack and poke one corner through the slit
- Sew the loop into the top edge and add the carabiner
- Clip to your leash and test one pull
Your holder is ready for its first walk, and you can now make a DIY dog poop bag holder again any time you want a spare for a second leash or a gift for a fellow dog owner. Refill it after each walk so it is never empty when you need it, and wash it when it gets muddy.
Pin this guide for later, and share it with a dog owner who still carries loose bags in a pocket.